DIY GALLERY WALL: ECLECTIC VINTAGE GALLERY WALL
/SPONSORED POST
This DIY project is sponsored by Custom Mat and I received compensation for this post. I wrote this article myself and as always, all opinions are 100% my own. This post also uses affiliate links. This means that if you purchase something that I feature, I’ll get a small commission (this will not increase the price of the item). Thank you for supporting KFI!
—
Whether you’re looking for a family photo gallery wall, a behind-the-couch gallery wall, or some gallery wall templates, you’ve landed in the right place. Welcome to my gallery wall and picture frame series; this where I show you how to get the most beautiful gallery walls on a budget.
I’m going to go ahead and bring you up to speed - here’s what I’ve covered so far:
FREE GALLERY WALL TEMPLATE: OVERSIZED MAT SQUARE FRAMES
GALLERY WALL TEMPLATE: OFFSET OVERSIZED MAT RAMSBORG FRAMES
AN OVERSIZED BLACK AND WHITE MAT GALLERY WALL GRID
DIY OVERSIZED MAT & SQUARE FAMILY PHOTO FRAMES
AN OVERSIZED MAT GALLERY WALL WITH IKEA RIBBA FRAMES
DIY MODERN ECLECTIC GALLERY WALL
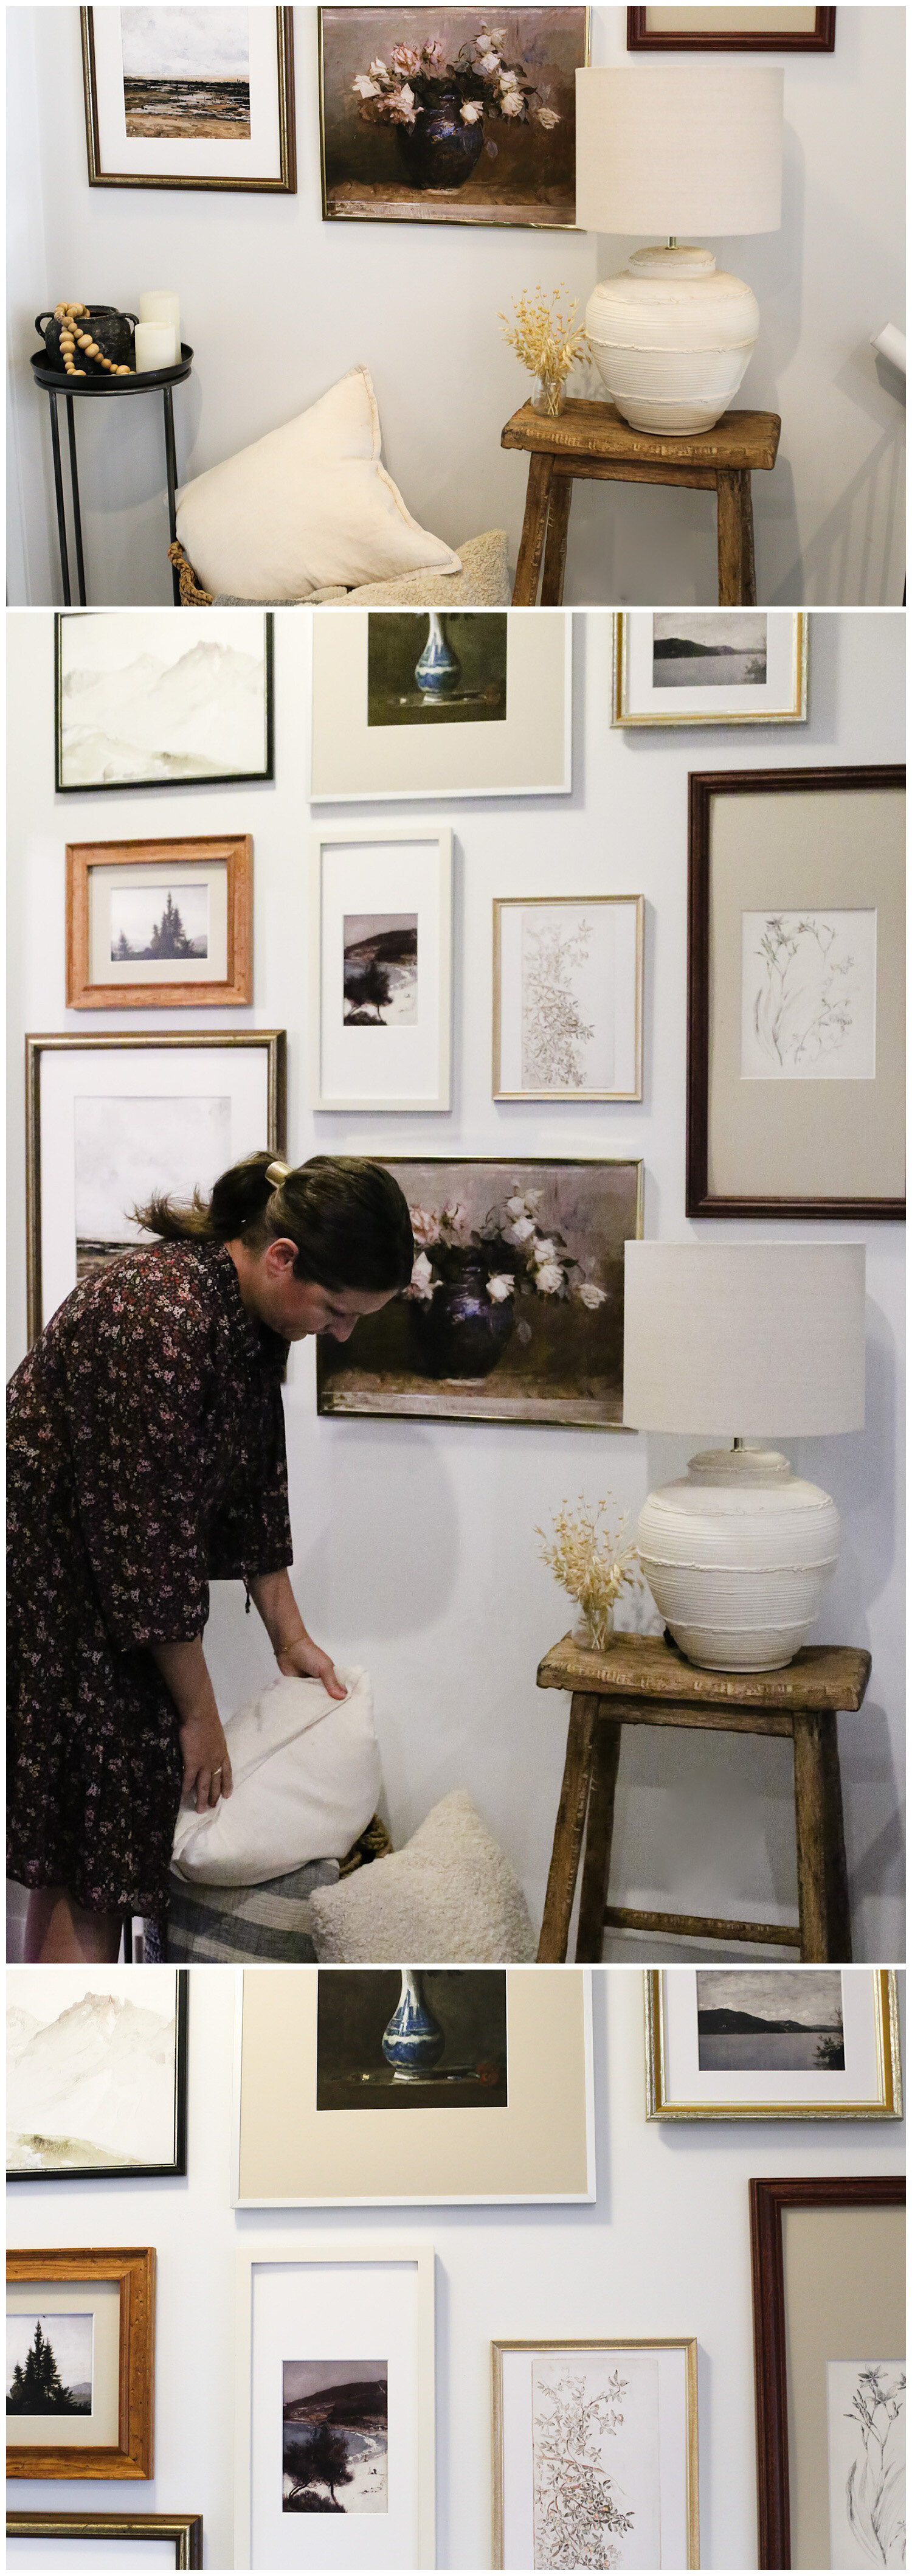
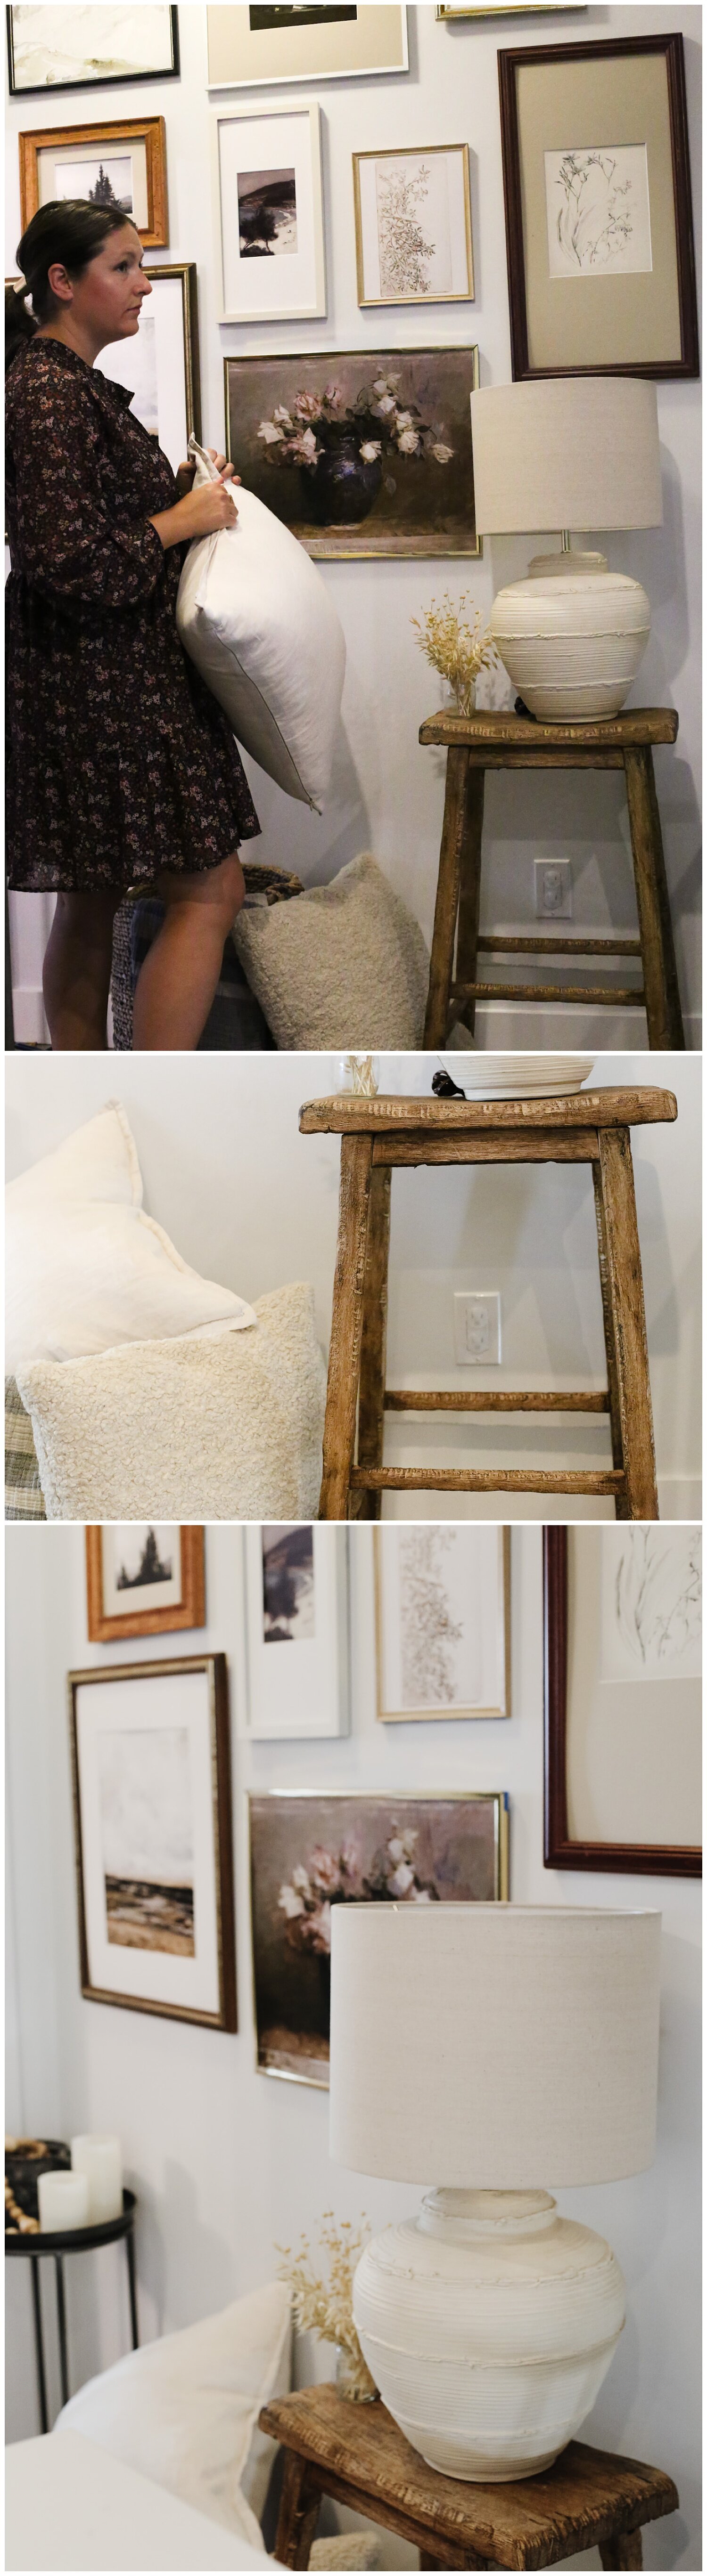
I’ve wanted to tackle an eclectic, vintage gallery wall for a while now. Why did it take me so long? I was intimidated. I’ve created a lot of gallery walls over the years, but the fact that I wanted to thrift the frames and that each frame was a different size made it feel extra intimidating.
After some planning, I finally got up the nerve to tackle a thrifted frame gallery wall, and you know what? It wasn’t as hard as I thought it was going to be. Even better, I’m sharing my exact process with you, so you can easily recreate this DIY on your own.
MATERIALS
Vintage Frames (if not thrifting, I love this set from CB2)


STEP ONE: CHOOSE YOUR SPACE AND SOURCE YOUR FRAMES
For this project, I chose to use thrifted, vintage frames. I collected them over a period of a few weeks at different thrift stores and paid anywhere from $1 to $8 each. One thrift store had a bin of free frames, so technically I got a few for free.
There are two things to keep in mind when you’re thrifting your frames:
It’s important to choose the frames based on the frames alone. Don’t focus on the faded, dated artwork because we will be taking that out.
Make sure to look at the hanging hardware and also how easy it will be to remove the backing. A few frames that I liked looked like they would be a nightmare to open up or hang, so I passed on them. Remember that you can also add your own picture hanging hardware to most frames, which I’ve linked to in the materials section of this post.
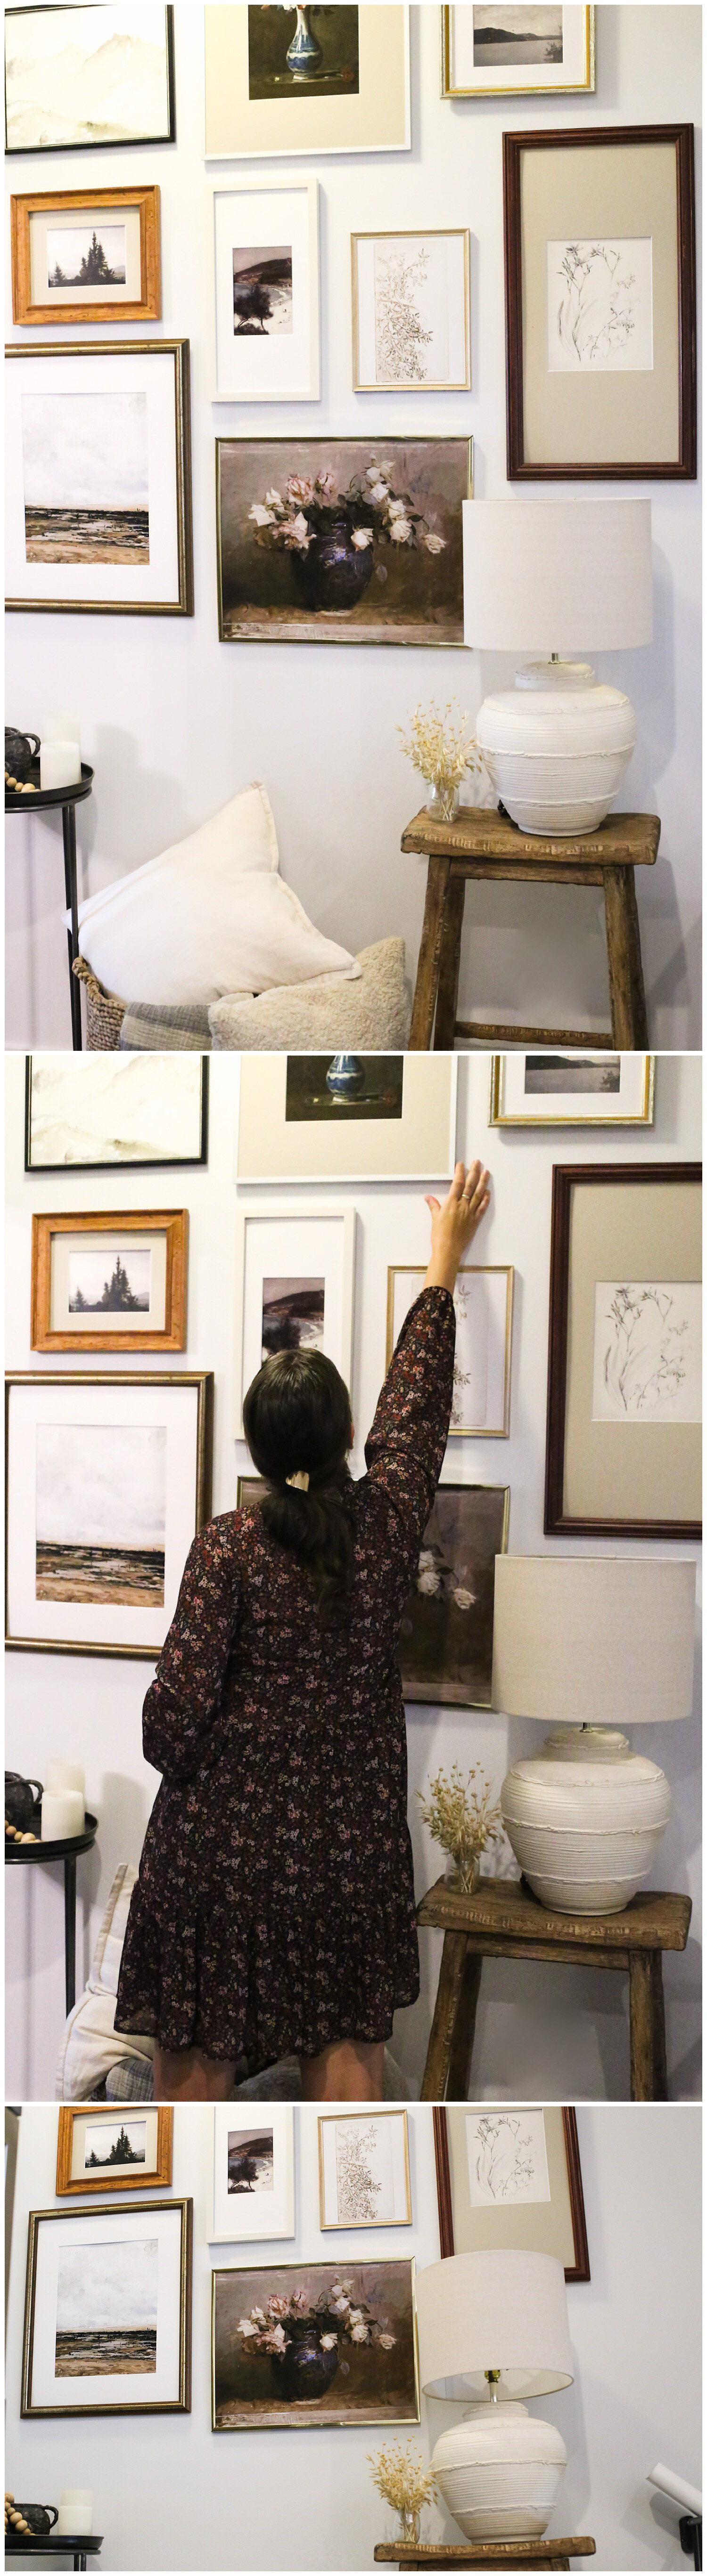
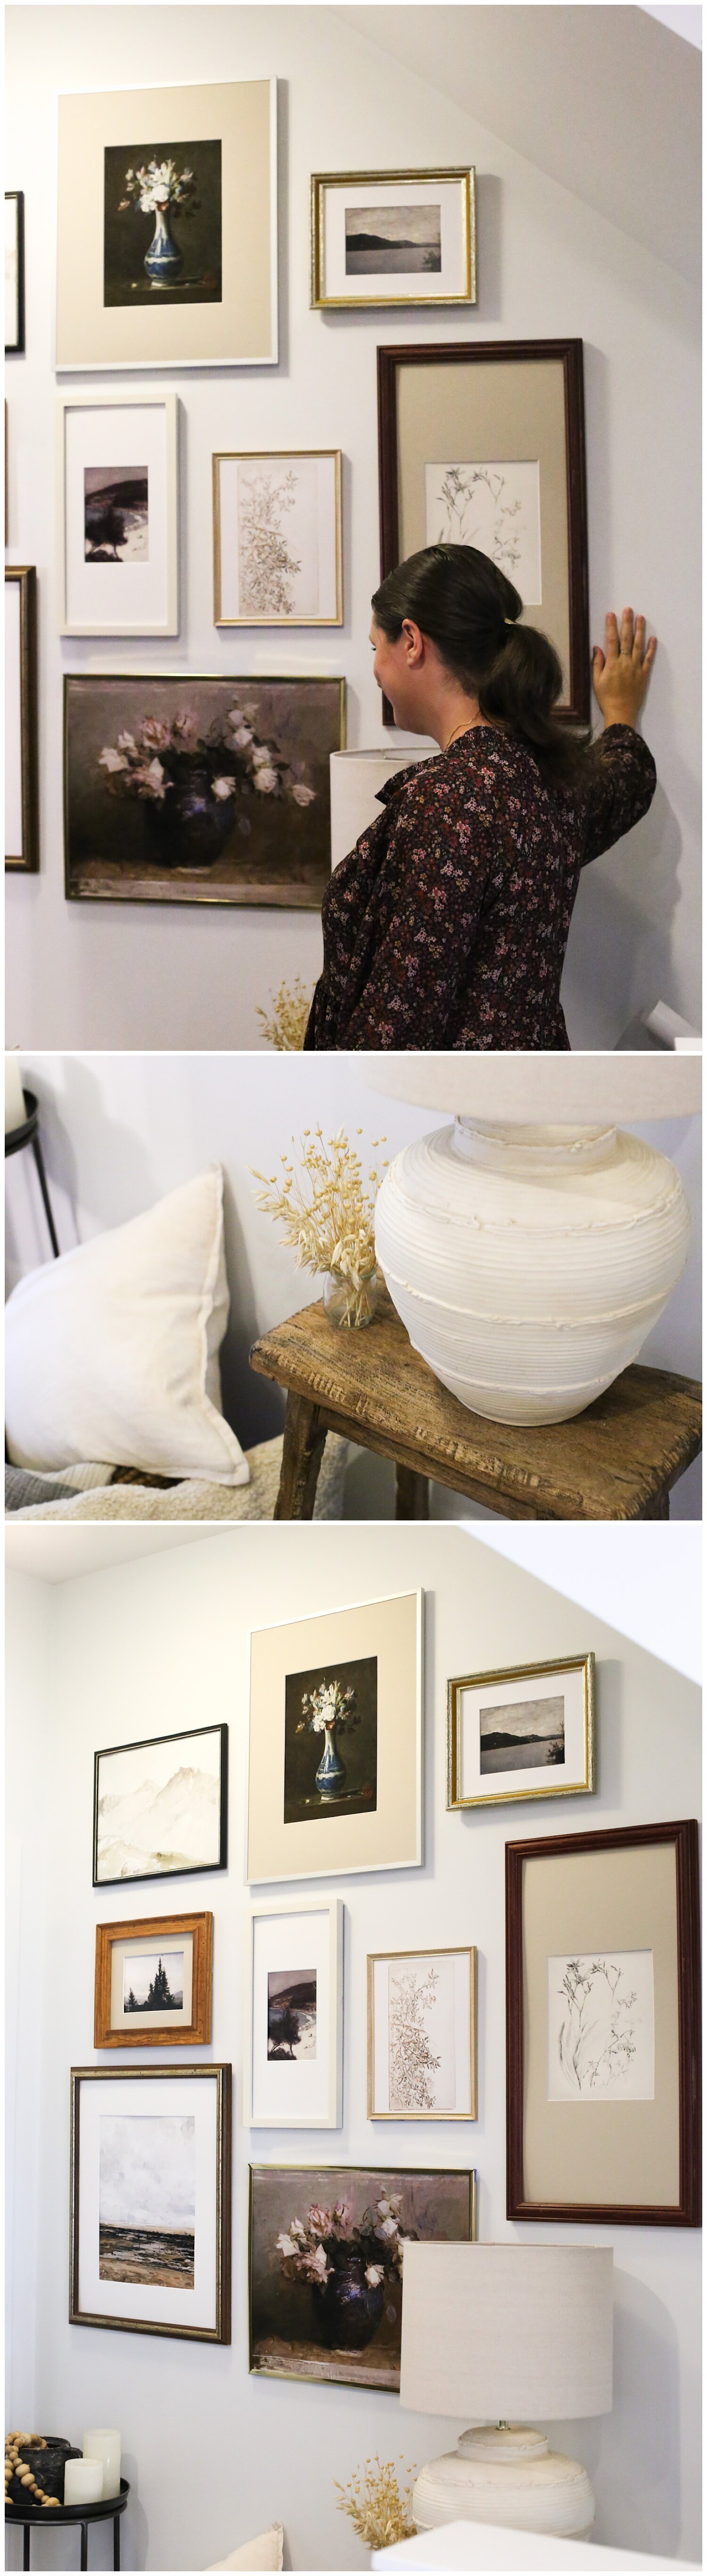
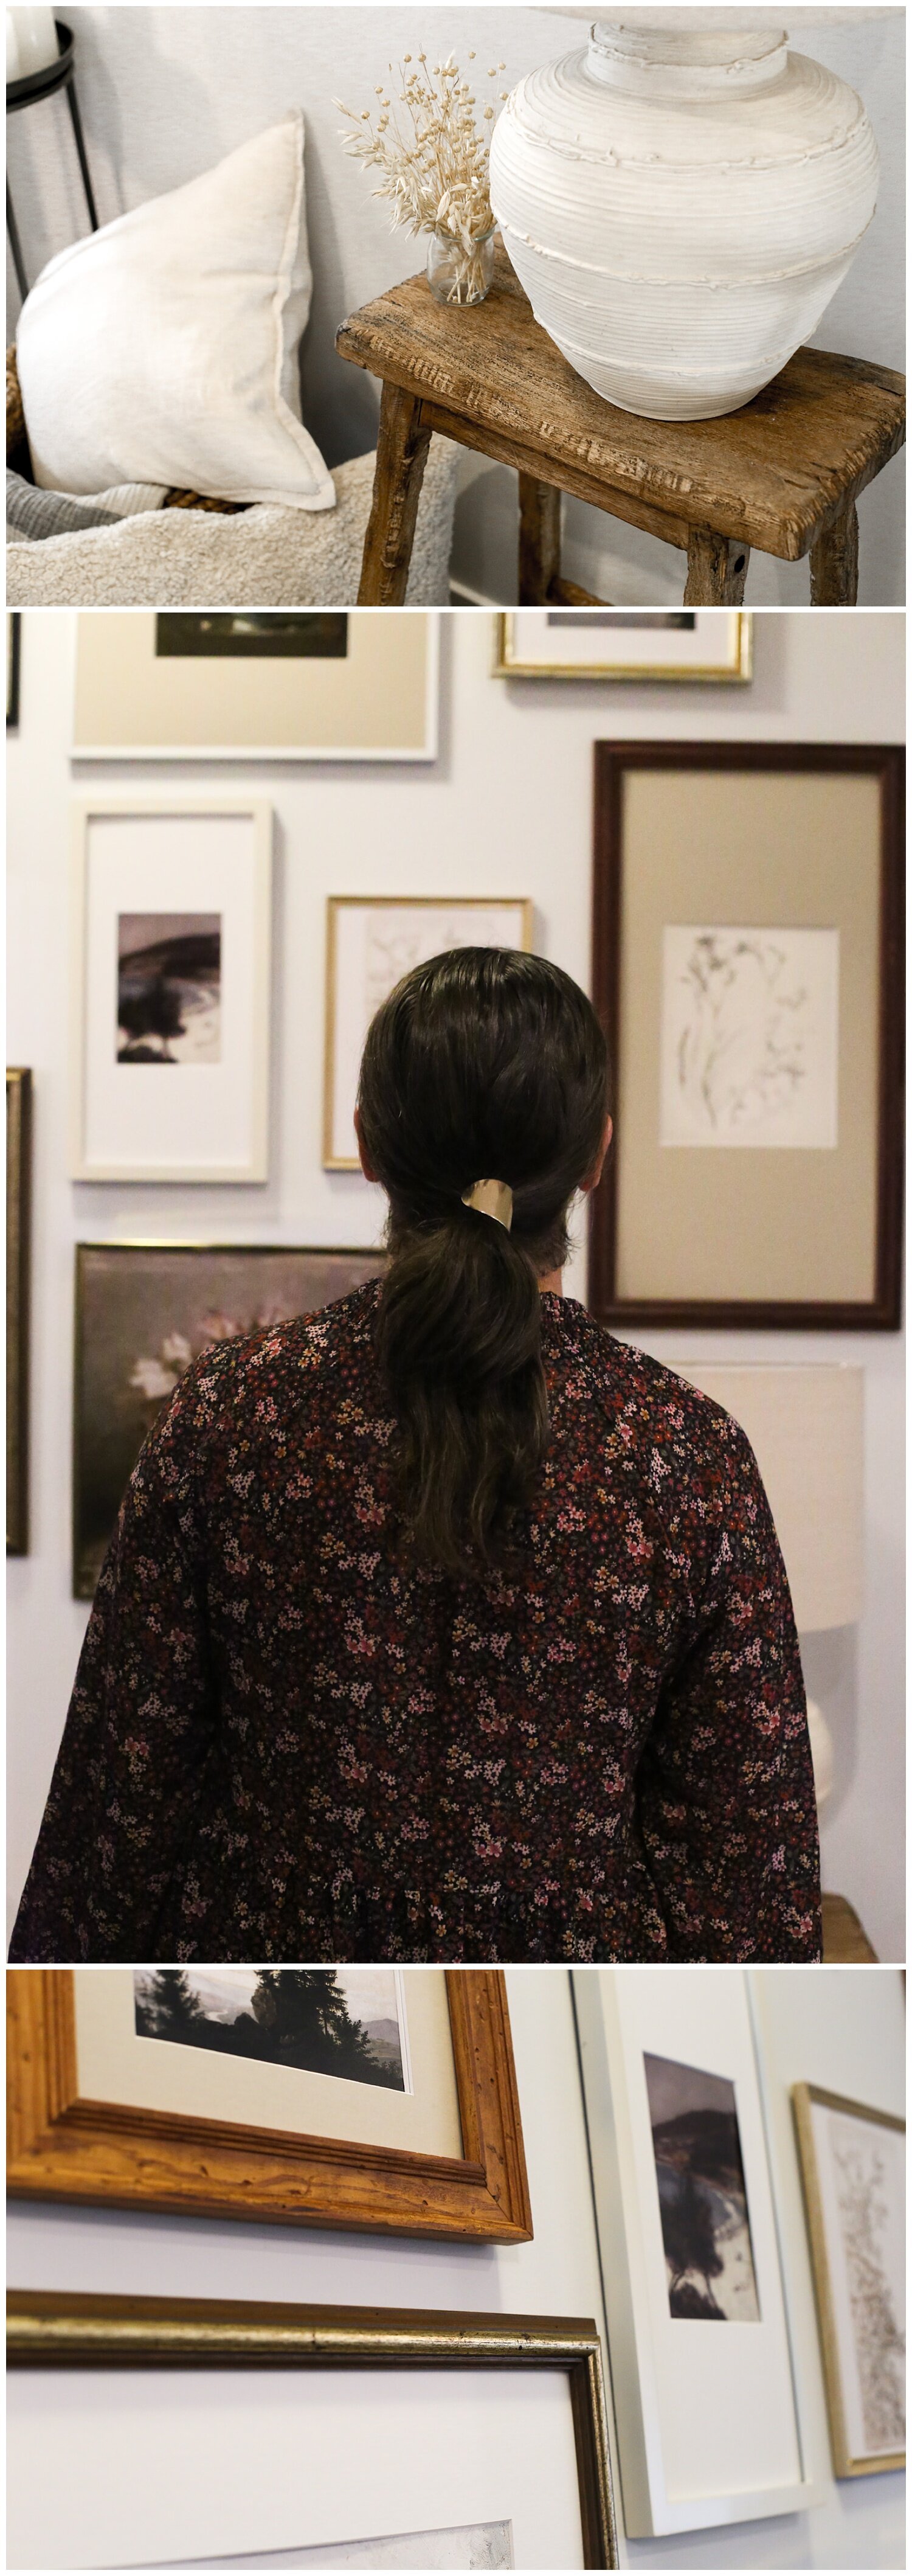
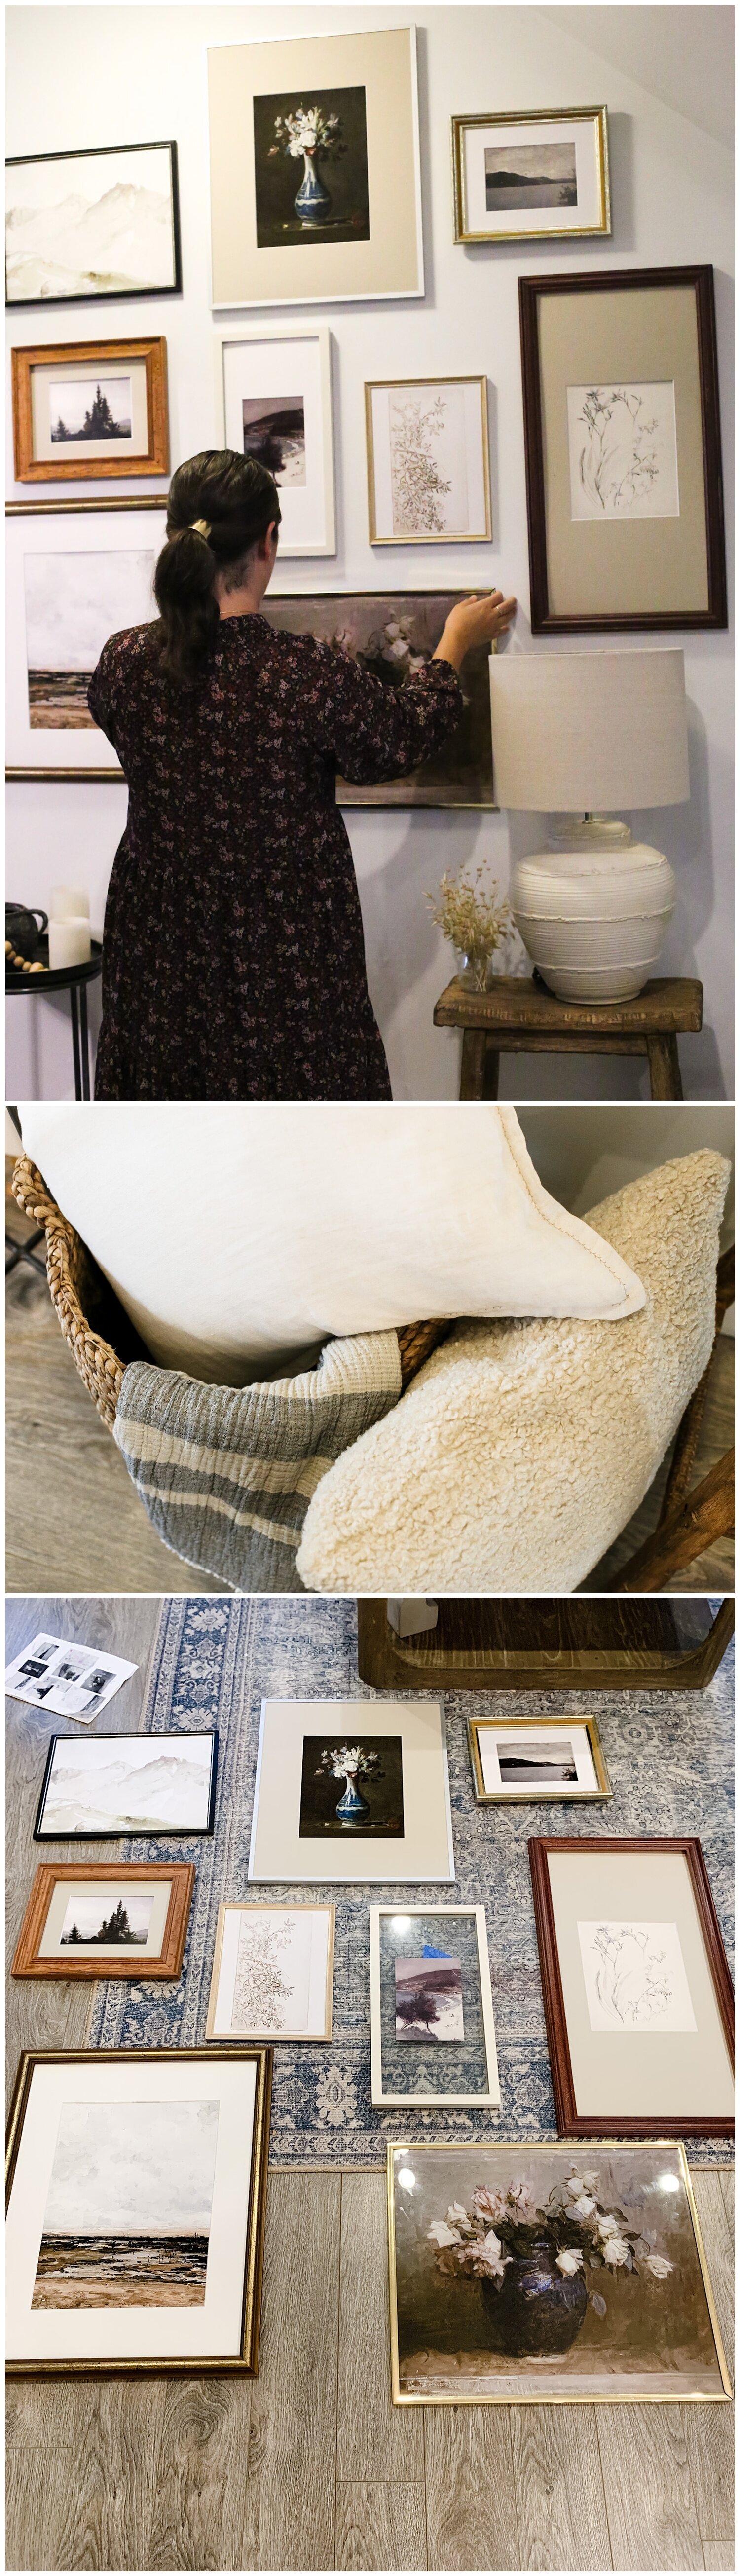
Once I had a bunch of frames, I traced them on to kraft paper so I could create a template. I then used painter’s tape to stick my templates to the wall so I could play around with the configuration. Finally, I numbered each piece of paper and stuck corresponding numbers on each frame with painter’s tape so I didn’t confuse myself when I moved on to step two.
This was probably the longest step in this DIY for me; the possibilities were endless, and I wanted to make sure I got the scale perfect.
To maintain a look of unity, aim to space as many of your photos equally apart as possible and/or choose to line them up at a common edge. Since this is an eclectic gallery wall, I didn’t want perfect unity, so I chose to space most of my frames 2.75 inches apart. I also lined up the tops of a few frames and lined up the centers of others. There’s no magic formula here; it’s trial and error and what you like best.


STEP TWO: PURCHASE CUSTOM MATTING TO ELEVATE YOUR FRAMES
The next step is to purchase your custom matting. I took out the backing of each frame, measured it, and noted the dimensions down on a piece of paper. I also noted the overall size of each frame.
I then input these measurements into Custom Mat’s interactive matboard designer tool and played around with the size of the artwork window I wanted in each frame; you can test different photo sizes in the tool and watch the proportions change live as you make them.
I usually go with Custom Mat’s Smooth White for the matting colour, but this time I chose China White. Since I was decorating with vintage art and frames, I wanted something a little more warm, so the contrast wouldn’t be so stark and modern.
I also decided to try coloured matting for the first time ever! I chose Seafoam as my secondary matting colour; it’s a beautiful taupe that works perfectly with the prints and China White matting. I’m so happy I took this leap - I feel like it really adds depth to the entire look.


STEP THREE: CHOOSE & PRINT YOUR ARTWORK
The Antique French Country Painting Set
The Light Soft Neutral Prints Set
The Rustic Forest Painting
The Coastal Sea Painting
The Vintage Beach Painting
I then took the downloadable files to Staples and printed them with the help of the staff. I got most of the artwork printed on 100 lb. paper; for the oversized artwork, I asked for them to be printed on a high quality paper. Due to the variety of print sizes and details, I highly recommend that you go in person to your local print shop to ensure that your oder is processed correctly.


STEP FOUR: SWAP OUT THE MATTING & ADD THE PHOTOS
This is where the magic happens! If you haven’t already, clean your frames and remove the old artwork. Put your brand new matting and artwork inside, and BOOM - you’ve got yourself a stunning piece of art. If you’re using vintage frames and they don’t have tabs that allow you to open and re-seal the backing of the frame, you can use glazier points to close it back up. I used these for a number of frames for this project; they are very easy to use and super affordable.


STEP FIVE: HANG YOUR GALLERY WALL
The final step in my gallery wall tutorials is always the hardest - hanging it. I chose to hang our gallery wall in our open-concept living room, but these frames would also make a great behind-the-couch gallery wall, stairway gallery wall, family photo gallery wall….well, you get the idea - the possibilities are endless.
If you make this gallery wall, please DM me on Instagram and send me photos; I love to see how you shop big and spend small with me.